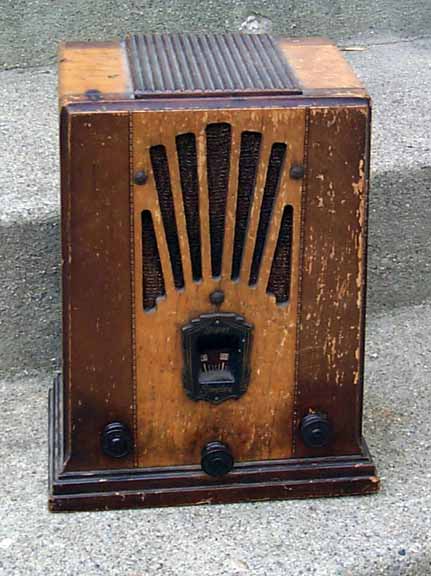
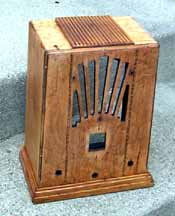
 I purchased this cute little Simplex off e-Bay in 2002 for around $40. I had no
idea the radio was so small until it showed up. The radio is constructed completely
of birdseye maple, with some sections toned and a nice dividing line of marquetry
inlay. The main fault of the radio case was a cigarette burn on the top, and a
flaking finish. The radio was also missing a knob. The radio, as found,
is at the left. I had already managed to come up with a knob, so the radio just
needed to be refinished at this point.
I purchased this cute little Simplex off e-Bay in 2002 for around $40. I had no
idea the radio was so small until it showed up. The radio is constructed completely
of birdseye maple, with some sections toned and a nice dividing line of marquetry
inlay. The main fault of the radio case was a cigarette burn on the top, and a
flaking finish. The radio was also missing a knob. The radio, as found,
is at the left. I had already managed to come up with a knob, so the radio just
needed to be refinished at this point.
Cabinet Restoration
|
|
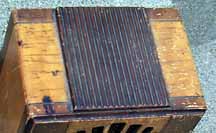
Burn on top
|
As you can see in the picture above, much of the toned lacquer on the radio
was in bad shape and is coming off. To the right, you can see the detail
of the burn on the top of the radio.
I removed the chassis and other hardware from the cabinet, and then began to strip
it. As always, I used Parks Refinisher and 000 steel wool to remove the old finish.
Because the finish was so far gone, it did not take much effort.
|
|
Stripped
|
The picture to the left shows the stripped case. The entire body of the case is birdseye
maple, with the trim and inlay being other woods.
I sanded down the burned area, and was able to get rid of most of the damage without
going so far into the veneer that the case would look weird. I also bleached
out the area to remove as much darkness from the wood as I could. Not being
real familiar with maple, I went ahead and grain-filled the case, even though
the maple didn't appear to be an open-grained wood. The wood took a little of
the filler, but not nearly as much as walnut or oak would.
|
|
Toning
|
The photo on the right shows the case being toned. The areas that were
supposed to be darker brown were carefully masked off and sprayed with my last
can of Behlen Brown (why, oh why, did they discontinue this color?). It
took about 20 minutes to tape off the case, and about 2 to tone it, but that's
the way it usually works. Once the lacquer was dry, I removed the tape and
lightly steel wooled the toner, so that there were no ridges between it and
the rest of the case. Then the case got several coats of clear laquer.
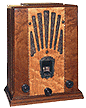
|
|
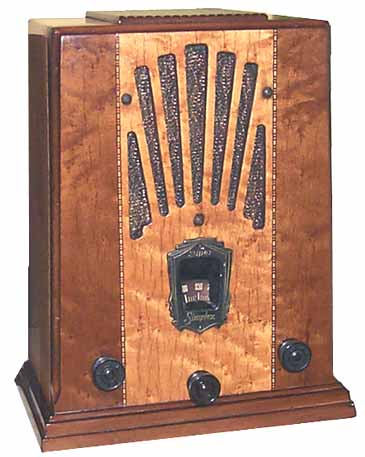
Done!
|
The photo to the left shows the finished radio with the grille cloth installed,
escutcheon re-attached, and the chassis installed with knobs. Click on the
photo for a larger image. This radio turned out really well. I didn't have
to work real hard on rubbing out the finish, because the maple was a very closed-grain
wood. A very light rub out and polish with wax was about all this radio needed.
|
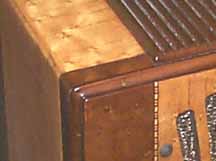
|
Fixed burn area
|
As for the burn area, the photo to the right shows that area after the radio
has been refinished. There is still a slight discoloration in that area,
but instead of looking like a burn, it looks like a normal variation in the
maple. If you didn't know it was there before, you'd never notice it now.
All in all, this project turned out well, and this is a beautiful little
radio which will be a stand out in my collection!