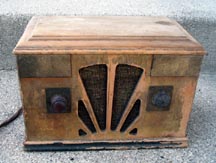
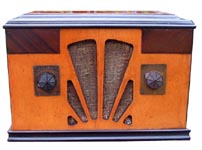
 This rough little Silvertone was purchased off e-Bay in the spring of 2005 for $12.
I like these little mantle radios, so I considered
it a good deal. I like the "sunrise" look of the radio's grille. The radio has no model number, and it isn't pictured in the Stein Silvertone Catalog
book, although a similar model is. The radio case was in poor shape. It appears heavily weathered,
with some veneer damage on the sides, and all the old lacquer finish is destroyed. The top has a large
dark stain. One knob is wrong.
This rough little Silvertone was purchased off e-Bay in the spring of 2005 for $12.
I like these little mantle radios, so I considered
it a good deal. I like the "sunrise" look of the radio's grille. The radio has no model number, and it isn't pictured in the Stein Silvertone Catalog
book, although a similar model is. The radio case was in poor shape. It appears heavily weathered,
with some veneer damage on the sides, and all the old lacquer finish is destroyed. The top has a large
dark stain. One knob is wrong.
Electronically, The chassis looked to be
complete, but I did not power it up. I pulled the chassis to save for a wintery
day.
Cabinet Restoration
|
|
Stripped radio
|
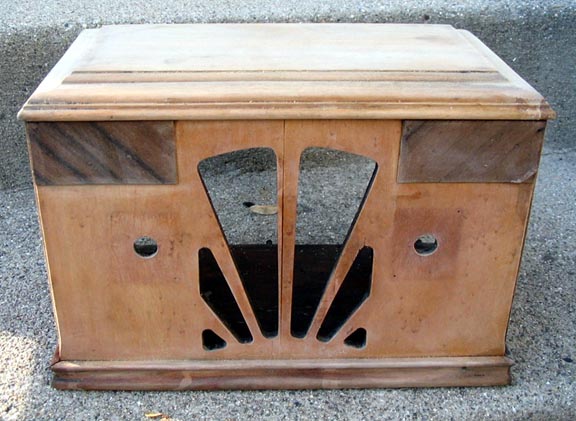
The radio clearly needed to be stripped and refinished. I removed the chassis and the dial
plates on the front, as well as the grille cloth. The radio was stripped with Parks refinisher
and 000 steel wool. The old finish was flaking so badly that stripping took only a few minutes.
The photo to the right shows the radio after stripping. The front of the radio is a birds-eye
maple, with walnut trim (the squares in the upper corners). The sides and top are a cheaper
wood which was toned to match the front.
|
|
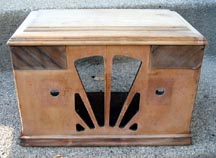
New Top Veneer
|
After stripping, I sanded and bleached the top a bit to try and remove the dark stain that
was in the veneer. Try as I might, I could not get that stain out. It may have been some
sort of oil which had penetrated through the veneer, and could not be neutralized. I could
not refinish over the top of it, so I replaced the top piece of veneer. The top was a light
piece of wood which was simply toned, so I re-veneered it using a piece of birch veneer. The
new veneer is shown on the stripped radio to the left.
There were also several veneer patches made to the sides of the radio, plus the case joints
were re-glued as they were coming apart. There was a slight chip on one of the walnut panels
on the front, and this too was patched.
Once all the veneer patches were made, the cabinet was grain filled using Bartley's grain filler.
The wood on this radio doesn't really need to be filled as it's mostly made of closed-grain
species, but I have found that the grain filler lightly stains the wood and evens out tone. This
was especially useful on the new veneer which was a bit brighter than the old.
The black trim areas were masked off and sprayed, and then the rest of the radio was toned. The
front panel was only slightly toned, as it is a nice birdseye maple. The top and sides were toned
to match this. Once the tone was right, the radio was sprayed with multiple coats of clear lacquer,
then rubbed out and polished.
|
|
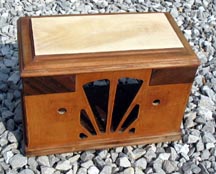
Done!
|
The finished radio is shown on the right. The grillecloth is the old one, and it does
have a few snags in it. A matching knob was found so that both knobs are correct. The
brass dial plates were left alone. I think the radio turned out quite well, and it's a cute
little set. I've since seen a few others like this one, but have yet to see one with a model
number. If anyone knows what the model number is, drop me an e-mail!