|
|
|
|
Other Radios - Wood Tabletop: Silvertone 7038 Restoration
Even someone who likes plastic radios likes wood radios, too! And, uhh,
these radios have plastic in them at least...on the knobs, the dials, etc!
|
| |
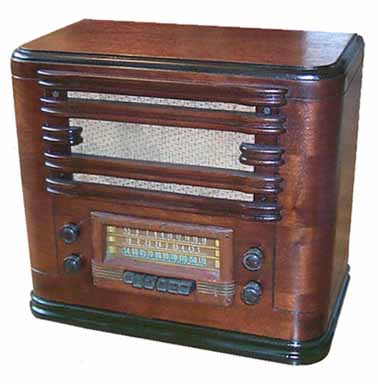
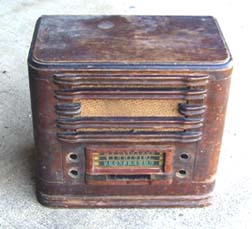 This beautiful Silvertone Tombstone style radio is from 1942. This is a very
large, 8-tube radio with several bands. I have the knobs, but had already
removed them when this picture was taken. As you can see,
the finish on the radio was destroyed when I got it. However, the wood itself
was in excellent shape with only one small veneer chip on the side, near the back.
That would be an easy fix. The case would need to be refinished.
This beautiful Silvertone Tombstone style radio is from 1942. This is a very
large, 8-tube radio with several bands. I have the knobs, but had already
removed them when this picture was taken. As you can see,
the finish on the radio was destroyed when I got it. However, the wood itself
was in excellent shape with only one small veneer chip on the side, near the back.
That would be an easy fix. The case would need to be refinished.
I didn't plug this radio in when I got it, because the cord was in very poor
shape. The chassis is somewhat rusted, and the dial cord in broken. However,
the rest of it seems to be in pretty good shape, including the speaker.
Cabinet Restoration
|
|
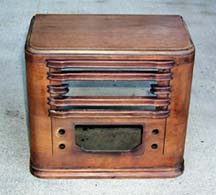
Cabinet after stripping
|
I began the restoration of this radio by removing the knobs, chassis,
and the dial glass (stored carefully in bubble wrap) and plastic escutcheon.
The escutcheon was screwed on, but the screws had rusted and could not be
removed. I used a power drill to drill them out. I then attacked the
cabinet with Parks refinisher, which is what I always use to remove a lacquer
finish. I spent quite a bit of time on this one - it is a large cabinet, and it
is a very beautiful walnut veneer. I wanted it to look right, so getting the
cabinet properly stripped was very important. The photo on the right shows
the cabinet after having the old finish removed.
At this point, I fixed a very minor veneer chip on the back right hand side
with a piece of walnut veneer salvaged from another old radio. The repair
is hard to see, even if you know what you are looking for. Once that was done,
I put on a coat of walnut stain. I then applied a few coats of sanding sealer,
then sprayed the dark colored trim.

|
Completed Radio
Click for a larger photo
|
The trim proved to be quite difficult, because I was using two different cans
of Van Dyke Brown toner. The top came out a little darker than the bottom, I
guess it is just the difference. So, I stripped off the bottom, bought a third
can of toner, and tried that. It was much closer to the top trim, so now it
looks pretty good. It may still be a little more "green" than I like, I'd
prefer a muddy looking dark brown. If I can ever find the exact shade, I may
go back and redo that part. I then finished the radio off with clear lacquer.
The finished radio is shown on the left.
Electronic Restoration
|
|
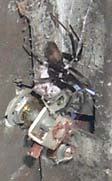
BIG SPIDER!!!
|
The radio was missing its cord, and the chassis was very dirty. While cleaning
the chassis, I came upon an extremely large (and lively) spider! I was able
to trap it in a jar, and later released it back into the wild. It sure scared
me, though! You can see it lurking on the bandswitch, to the right. Once
the chassis was cleaned up a bit, I replaced the electrolytics, a dead output
tube, and wired in a new cord. I then cautiously powered up the radio, and was
surprised to hear audio right away! Even though the radio now worked, I decided
to go ahead and replace all the old paper capacitors with new units. I also
replaced several out-of-spec resistors, and the set works great now! This
radio has push-pull output, so it can really thump away!
|
|