|
|
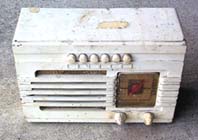
The PT-47 as found
|
I bought this junker off eBay for $11. I liked the description so much,
I just had to bid on it:
"WOW, what a mess! Hard to believe - but this was a nice radio at one time.
It is (was?) a 1939 Bakelite Philco,
Model PT-47, with push buttons. The radio has a chunk that was broken
out of the bottom, and poorly re-glued
back into place. It has been splatter painted white, with quite
possibly a dirty broom, and most probably by a
small, drunk child. It has masking tape, scotch tape, dirt, and
scratches all over it. It is however, complete. This
radio needs plenty of love and kindness, and is being sold as is."
It's really not as bad as it looks. It needs to be repainted, and that will
solve most of its problems. The case is slightly bowed on the top, but there's nothing
I can do to fix that. It's totally dead, electronically, but that
can wait until the case is restored.

|
|
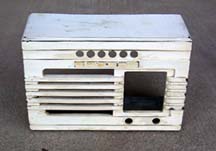
PT-47 Sanded
|
Cabinet Restoration
The first thing I did was to remove the chassis from the case, which was
quite easy. Once the chassis was free, removed the dial cover, as well
as the grille cloth. The case itself really wasn't in bad shape, there was
a chunk out of the bottom which had broken out, but the piece was present.
I glued this back together with Ace 60-second epoxy and it held quite well.
The case really just needed to be sanded down and re-painted. This is a pretty
easy job. I sanded down the areas where it had been previously painted,
revealing the standard off-white Philco paint below. The sanded case is shown
on the right.

|
|
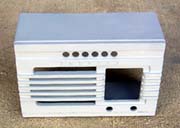
PT-47 Primed
|
Once the case was sanded down, I carefully looked it over to make sure
there weren't any places I had missed. Once it looked right, I went ahead
and primed the case with gray primer. I was then able to see a few areas
which needed more sanding. I repeated the cycle until I was happy with
the case. Then I was ready for the finish coats. I used my trusty standby
paint, Krylon Antique White. I felt that it was a close match for the original
color. I sprayed on heavy, thick coats on each side, turning the case to
hit the next side when one side was dry. I then let the case dry overnight.

|
|
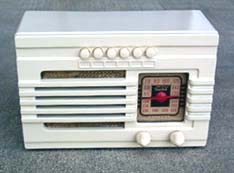
It's all done!
|
Once the case was really dry, I lightly sanded down the paint a bit, then
polished it out. The case turned out quite well as you can see on the right.
The dial cover was covered in paint splatters. I soaked it for a bit in water
to loosen them up, then scraped them off with my fingernail. I then polished
and re-installed the dial cover. The grillecloth was in decent shape, so I
re-installed it as is. The pushbuttons and knobs had been covered in white
paint as well, so they soaked for a couple days in a solution of water and
dish soap. This loosened the paint enough that it could be removed with a
scrub brush. Once the pushbuttons and knobs were clean, I re-assembled the
radio.
The electronic restoration will wait for a rainy day....


