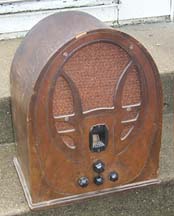
 I purchased this Philco from a fellow collector at the summer IHRS meet for $40.
The radio case was in reasonable shape, with a few pieces of veneer missing along
the top edge of the arch. The case had been broken in the past, and was reinforced
inside with some plywood. Structurally, it was ok, but the trim along the base
did not quite line up, due to the repair.
Electronically, The chassis looked to be
complete, but I did not power it up. I pulled the chassis to save for a different day.
Cabinet Restoration

|
|
Fixing veneer chip
|
I decided to refinish the radio in a style a little different than it came in. I
have seen several Philco 89's done in brown, with black lacquer detail. This is similar
to other Philco radios of the time such as the model 45 and 16b tombstone. The picture
of the 89 in the Stein Machine to Jet Age book appears to be a black/brown model -
though the photo is in black and white. I have no idea if these were real production
radios, or simply creative refinishing jobs. It would be much easier to hide
the veneer chips on this radio if the trim could be done in black lacquer.
I stripped the radio using Parks Refinisher and 000 wool. I spent quite a bit
of time on the stripping of this radio - I had an image of what it would look
like in my mind, and I wanted a good foundation to start with. A bad job of
stripping the old finish would leave remnants, which would make the final result
not as perfect.
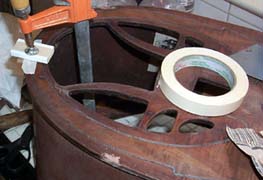
The photo above shows the patching of one of the veneer chips. A piece of
veneer was cut to size, glued, and clamped into the appropriate place. Once the
glue had dried, the veneer was carefully sanded to make the repair flush.

|
|
Working on side trim
|
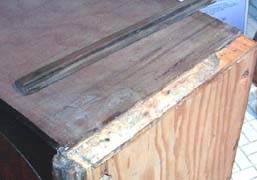
The photo to the left shows one of the trim pieces removed. They didn't line up
properly, giving the radio an "off kilter" look. I removed this piece of trim, and
cut down the veneer on the side of the radio so it would sit flush with the front
trim piece. This ended up looking much better.
Once the case was prepared, I masked off the front and began to spray black lacquer.
This took some time as I sprayed multiple coats to fill the grain and give a nice
smooth feel. The lacquer was rubbed down a bit in between with 0000 steel wool.
Once the black was done, the rest of the case was stained and sealed with a coat
of clear lacquer.

|
|
Applying toned lacquer
|
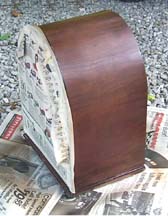
The photo to the right shows the toning of the sides of the radio. Cheap wood
was used to form the "Arch" of the cathedral, while the front was done in walnut
veneers. The wood on the sides needed to be darkened some so that it would not
look completely out of place. Behlen master toner brown was used, and produced
a darker finish. It's a little more red than I generally like, but that is due
mostly to the underlying wood, and not the toner itself. Often times, I will
also lay a few coats of toner on the front, to help match the various woods. I did that in this case,
but then scrubbed it off. It dulled what I considered to be a beautiful pattern
in the wood, and I decided that this was more important than an exact color match.

|
The Finished 89
Click for a larger picture
|
Many coats of clear lacquer went on the radio, and were let to cure for a few days.
The finish was then rubbed out using 0000 steel wool, 600 grit silicon carbide paper,
1500 grit silicon carbide paper, and lemon oil. Once the finish was rubbed out, a
coat of fine furniture wax was applied to protect the finish. The radio was reassembled
with the grille cloth and knobs. The finished radio is shown on the left. I'm very
happy with the way this one turned out!
Electronic Restoration
I'm waiting for the snow to fly before I begin on the chassis restoration. Summer
is for cabinet work - and I have a lot of projects to work on!


