|
|
|
|
Wood Radios: Majestic 161 Restoration
|
| |
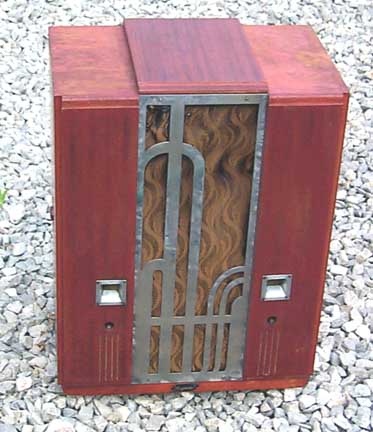
 I purchased this Majestic tombstone off e-Bay in the spring of 2004
for what I considered a song -- around $150. These radios are incredibly rare,
and I've only seen two or three in the time I've been collecting. Of course,
this radio had a lot of problems. The grillecloth is wrong (it's an old Zenith
pattern). The radio had some veneer chips and some water damage on the top. The radio had been poorly refinished
using what appears to be Redwood deck stain (ugh). The chrome had been over-polished
to the extent that the nickel was showing through, the chromium having been
completely worn off. Luckily, I saw an example
of this radio for sale at the 2004 Lansing Swap meet that had an original looking
finish on it. That radio sold for over $500! Using that mental picture (someone
snapped it up within 2 minutes of the meet starting, so I didn't have time to take a
photo), I was
hopeful I could restore this Majestic to its former beauty.
I purchased this Majestic tombstone off e-Bay in the spring of 2004
for what I considered a song -- around $150. These radios are incredibly rare,
and I've only seen two or three in the time I've been collecting. Of course,
this radio had a lot of problems. The grillecloth is wrong (it's an old Zenith
pattern). The radio had some veneer chips and some water damage on the top. The radio had been poorly refinished
using what appears to be Redwood deck stain (ugh). The chrome had been over-polished
to the extent that the nickel was showing through, the chromium having been
completely worn off. Luckily, I saw an example
of this radio for sale at the 2004 Lansing Swap meet that had an original looking
finish on it. That radio sold for over $500! Using that mental picture (someone
snapped it up within 2 minutes of the meet starting, so I didn't have time to take a
photo), I was
hopeful I could restore this Majestic to its former beauty.
Cabinet Restoration

|
|
Stripped...
|
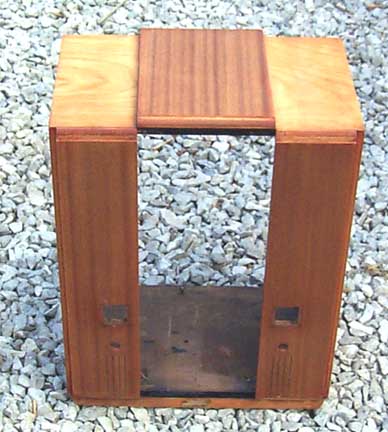
The first thing to do was to go ahead and strip the radio. This part was easy,
as the existing finish was not very good. It really does appear that it was
redwood deck stain of some kind that was used -- the rags and leftovers from the
stripping process were a red mess! The photo to the right shows the cabinet
after stripping. This radio has a front and top panel of mahogany, with the
balance of the cabinet covered in birch, poplar, or some other light colored wood. You
can see the difference between the two woods after stripping. The ligher colored
panels would need to be toned to match their mahogany counterparts. The radio
also would have had black trim in many places, something that I noted when
viewing the example for sale at Lansing.
|
|
Spraying trim...
|
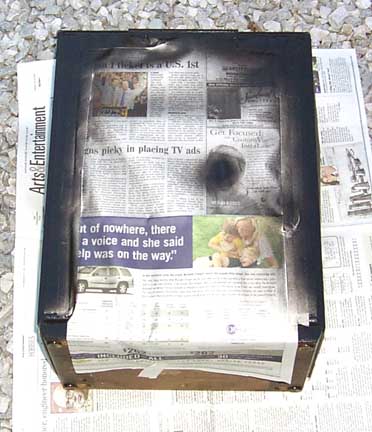
After stripping the radio, the cabinet was sanded and filled with paste wood
grain filler. The filler doesn't really need to be applied to the birch or poplar
pieces, as those are close-pored wood which does not take filler. However, the
mahogany did take the filler well, and several coats were applied. The radio
was also sanded several times to help remove the deep reddish stains that had
happened when it was refinished the first time. Once that was done, I taped
off and sprayed the black trim. The photo to the left shows the trim being
painted. I use Ace Hardware gloss black lacquer and standard masking tape.
Newspaper is good for covering areas that you don't want sprayed.
|
|
Veneer fix..
|
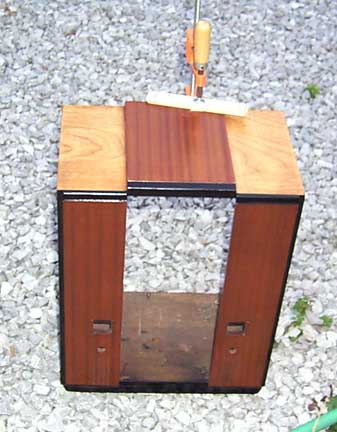
The photo on the right shows the case with a clamp on it, fixing a small veneer
problem. There were a couple veneer chips on this radio, but they were all on
the mahogany areas, and fortunately, mahogany is pretty easy to patch. I usually
just cut a piece a little bigger than the chip, glue it down, then clamp hard.
When the glue is dry, I sand the edges of the patch down and feather it into
the existing veneer. This worked very well on this radio. You can also see how
the black trim turned out.
The radio was then sprayed with several coats of toning lacquer on the lighter
areas. This included two pieces of the top, and both sides. Once these were
dark enough, I also shot a little toner over the mahogany areas to make sure
they had a similar tone as the newly sprayed areas. After drying and a quick
rubdown with 0000 steel wool, the set was coated with multiple coats of clear
lacquer.
The grille was taken to a chrome plating shop, and was replated at a cost
of $65. I was able to clean up the other trim pieces without having them
replated. A silver patterened grille cloth was found that looks pretty good.
|
|
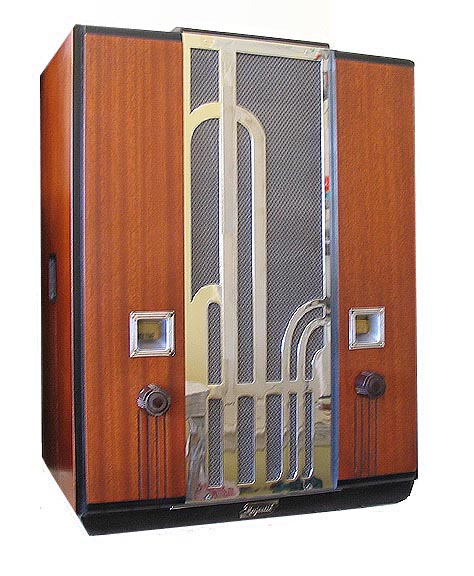
Done!
|
After the finish had cured, the radio was rubbed out with successively
finer grits of sandpaper, and then polished with a high quality paste wax.
The grille cloth and newly chromed grille were installed.
The photo to the left shows the complete radio (click on it for a larger picture). The radio turned out
beautifully, and it even impressed my girlfriend (and she's not a radio
buff). At some point, I may have to restore the chassis, but for now,
I'm just enjoying having this radio to look at!
| |