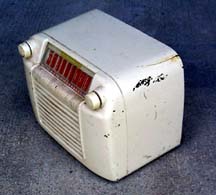
 I picked up this radio quite cheaply off e-Bay. I will sometimes bid
on an item that needs "help", just because the opening bid is so low.
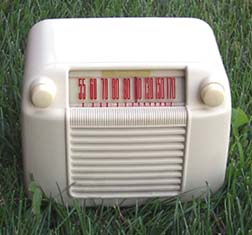
Sometimes, I win the item, which was the case with this Firestone radio.
As you can see, the paint is in poor shape, and there was a very tight
crack on the case.
I picked up this radio quite cheaply off e-Bay. I will sometimes bid
on an item that needs "help", just because the opening bid is so low.
Sometimes, I win the item, which was the case with this Firestone radio.
As you can see, the paint is in poor shape, and there was a very tight
crack on the case.
This radio seemed to work ok as found, but I will probably replace
the electrolytic capactors once the case has been fixed and repainted.
Cabinet Restoration
|
|
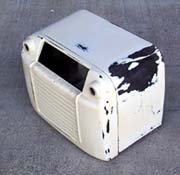
Detail of crack area
|
I began the restoration of this radio by removing the knobs, chassis,
and the dial glass (stored carefully in bubble wrap). As you can see from
the photo on the right, there is a very tight crack in the case with
no chips or loss of bakelite. I spread some 60-second epoxy on the crack,
both from the top and bottom. I made sure to get some epoxy into the crack.
I let the epoxy harden over night.
|
|
After Sanding
|
Once the epoxy was hardened, I sanded down the case and put a thin layer
of glazing putty over the crack. I feathered down the areas where there
had been large paint chips, using first 200 grit and then 400 grit
sand paper. Once the case had been sanded down, the radio was ready
to be primed.
|
|
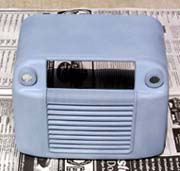
Primed
|
The photo on the right shows the case after priming. After the inital priming,
I did notice some areas that needed a bit more attention. A little bit more
sanding, and those areas were ready to go. I then primed the case again. Once
the case was dry, I examined it again and it looked pretty good. I then lightly
sanded the case with 400 paper, getting it ready for the final coat.
I sprayed on several thick, heavy coats of Antique White paint for the final
coats, letting the paint dry slightly between coats. It's important to not
lay the paint on too heavy on the vertical areas, or the paint may run. Once
the paint was done, I let the case dry for quite some time (about a week)
before sanding and polishing it down.
|
|
All done...
|
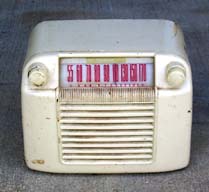
The case was wet-sanded with 600 grit paper, which I find is about right -
coarse enough to smooth out the surface, but not so coarse as to take off
too much paint and require re-coating. Once the case was sanded down,
I polished it with Novus polish, which brought out a nice shine to the new
paint. The finished radio is shown on the left, and I think it turned
out great!
Electronic Restoration
The radio does work fine, but I may go
in and replace the filter capacitors at some point, but they're fine for now.


