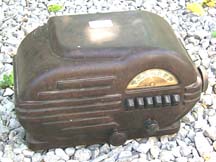
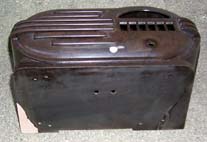
 I found this Belmont 6-D-111 at the James Dean Festival in Fairmount, IN, in September, 2001.
I was excited to find this radio, because these are fairly expensive to buy.
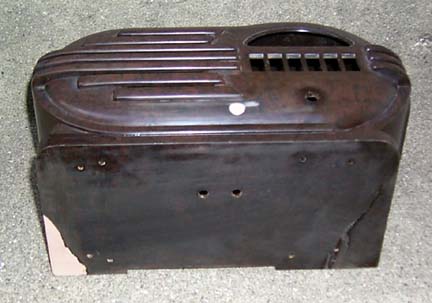
The radio was only $20! However, there were some serious problems with the
radio. Someone had drilled a hole in the front of the cabinet and installed
a tone control (side note: the knob from the tone control was the perfect
match for an RCA 128 I have to restore - excellent!). Also, the radio had been dropped at one point and the
bottom edge on one side was cracked, with a portion of the bakelite missing.
Undeterred, I bought the radio. I decided to repair the bakelite and paint
the radio white, a common color for this radio.
I found this Belmont 6-D-111 at the James Dean Festival in Fairmount, IN, in September, 2001.
I was excited to find this radio, because these are fairly expensive to buy.
The radio was only $20! However, there were some serious problems with the
radio. Someone had drilled a hole in the front of the cabinet and installed
a tone control (side note: the knob from the tone control was the perfect
match for an RCA 128 I have to restore - excellent!). Also, the radio had been dropped at one point and the
bottom edge on one side was cracked, with a portion of the bakelite missing.
Undeterred, I bought the radio. I decided to repair the bakelite and paint
the radio white, a common color for this radio.
Cabinet Restoration
|
|
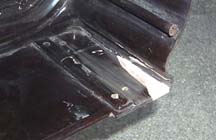
Detail of Patched Areas
|
I began the restoration of this radio by removing the knobs, chassis,
and the dial cover from the radio. Once the radio case was empty, I washed
it carefully. I decided to use a different method for fixing the chips in
this radio. I wanted the patches of the radio to be completely
invisible, which meant no interior (or exterior) supporting material could be used.
To temporarily support the area, I used a piece of duct tape to cover the damaged areas, then
slathered on bondo. In previous restorations, I used a piece of clear plastic
as a support, glued to the case with epoxy. This time around, the plan was to
use a piece of duct tape as the support, then remove the support after the bondo
had cured.
|
|
Detail of Patched Area
|
While the bondo was hardening, I knocked it down a bit with an X-acto knife. You
can "shave" the bondo down to size, which minimizes the amount of sanding later.
Once cured, I sanded both areas down so that the patch fit closely into the
chipped area. I then removed the duct tape patch. Bondo and bakelite do not
adhere well together. Once the duct tape was removed, stress lines appeared
around the edges of the patch when the case was flexed. This was not good -
it would cause the paint to chip and crack if the case was mishandled. I had
expected this would happen. While flexing the case, I slowly dripped epoxy into
the cracks which appeared. This helps to adhere the bondo patch to the case a little
better. Once the epoxy had cured, flexing the case showed no stress lines between
the bondo patch and the bakelite case. I was now ready to prime the case.
|
|
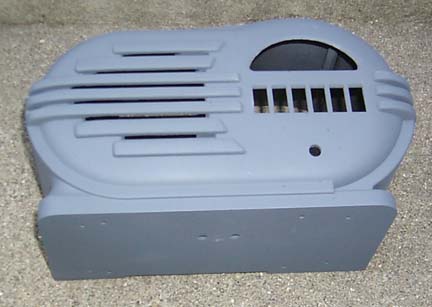
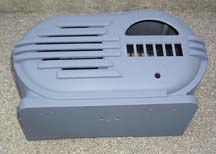
Primed
|
The photo on the right shows the case after priming. The case was
primed with a plain Kyrlon primer. Once the case has been primed,
you can go back and look for details that you may have missed during
the repair process.
After priming, I could see a few places where the repair was still visible.
These places were either sanded down more, or if they were too low, they
were filled in with glazing putty.
|
|
Glazing Trouble Spots
|
The photo to the left shows the case with glazing putty applied to some
of the bad spots. Glazing putty is another automotive body compound which
you should be able to find at any automotive or hardware store. It can
fill small imperfections, and is easily sanded. Once you have filled
and sanded with the glazing putty, another quick coat of primer will
show you if the repair is successful. You continue these cycles until
you are happy with the result.
|
|
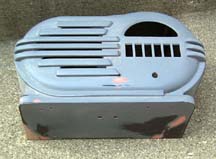
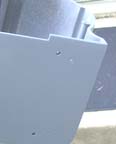
Primed Damage Area
|
The photo to the right shows the bottom edge of the case, in the damaged area. As you
can see, the repair has been blended in and is invisible. This was a tricky
repair because the missing bakelite spanned two sides. Therefore, to get a straight
edge across the bottom, it was important to sand using a flat surface such as a sanding
block.
Once the final primer coat has been sprayed on, it is time for the finish coat. The
primer coat was sanded down and carefully cleaned. I usually use a 400 grit paper
to sand down the primer, which leaves a very smooth surface for the finish coat
to adhere to.
|
|
Painting..
|
The photo on the left shows the case being painted. I'm still using spray cans
to do this work, but someday hope to get a compressor and professional equipment
to get better results. It is possible to get very good results using spray cans,
but it is undoubtably harder. I laid on several thick coats of Krylon "Antique White",
making sure not to get any runs. Despite my best effors, I did have one small run
on the case. This was wet-sanded out after the paint had cured, then another
finish coat was added. Notice that the hole drilled in the front of the case
is now completely invisible! With this radio, I also sprayed the inside of the
case. Normally, a white painted bakelite radio is brown on the inside. However,
I didn't want my bondo patch to be visible, so the inside of the case was painted
white as well. While this doesn't look exactly correct, I believe it is better
than having the orange bondo showing.
|
|
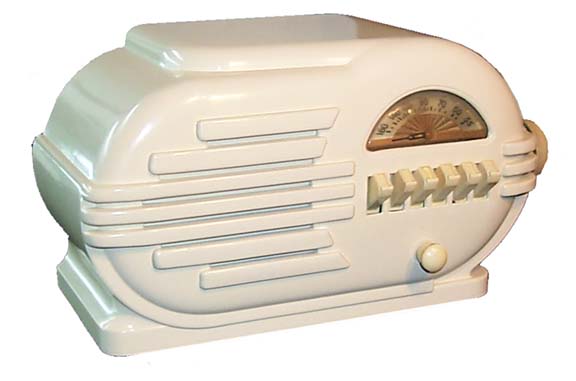
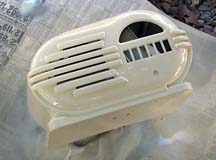
Done!
|
The photo to the right shows the completed radio (click for a larger picture). I
happened to have a few of the pushbuttons in white, so I used those instead
of painting the brown ones. I think they look more realistic, as the pushbuttons
and paint on these radios don't tend to match 100% - they may have at first,
but with age they are not identical anymore. If you see a radio where the pushbuttons
and the paint color match exactly, it is likely that the buttons have been painted.
Once the paint was cured, the case was wet sanded with 600 grit paper, then 1500 grit
paper. I do this in the sink with the water running - be careful not to sand too
hard, or you will go through the finish coat. Then, the case was finished using
white automotive rubbing compound and polish. The end result is quite pleasing.
There is no evidence of either repair, unless you count the fact that the inside
of the case is painted as evidence. Only time will tell how well this repair
will hold up. I am a bit uneasy that the lack of support may cause the bakelite
repair to fall out, but we shall see. Check back in a few years - I'll let you
know!