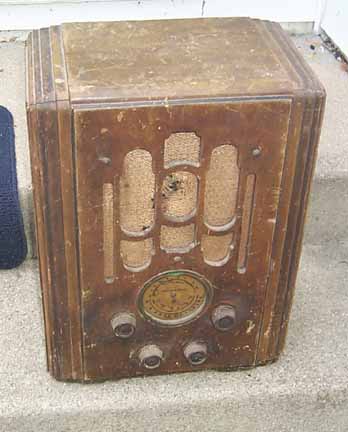
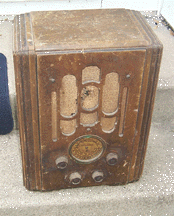
 I purchased this AK tombstone at the IHRS swap in May of 2004. I waited until
late in the second day to buy it, I really wanted to pick up another radio, and
this was the one. I got it for $30, mostly because of its very rough condition and
also because it was missing its speaker. On the plus side, the cabinet looked
restorable, the knobs were present, and the chassis looked otherwise complete (albeit
dirty and with some minor rust). The dial glass also appears to be missing. The
grille cloth was dirty and full of holes.
I purchased this AK tombstone at the IHRS swap in May of 2004. I waited until
late in the second day to buy it, I really wanted to pick up another radio, and
this was the one. I got it for $30, mostly because of its very rough condition and
also because it was missing its speaker. On the plus side, the cabinet looked
restorable, the knobs were present, and the chassis looked otherwise complete (albeit
dirty and with some minor rust). The dial glass also appears to be missing. The
grille cloth was dirty and full of holes.
Cabinet Restoration

|
|
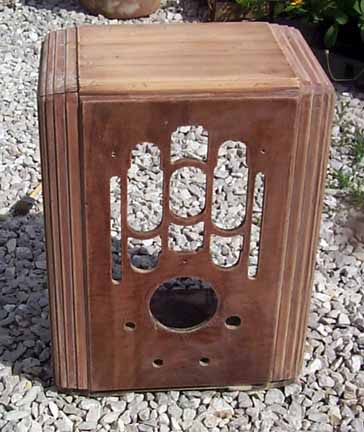
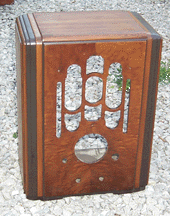
Stripped cabinet
|
The cabinet finish was in quite poor shape, with the lacquer flaking off or
gone in many places. This radio has all the signs of being stored in a barn for
many years. The cabinet had a few veneer chips (all on the front, of course),
and some deep scratches on the top and sides. The top and sides are a cheaper,
toned wood, with the front being a nice panel of bookmatched butt walnut veneer.
The edges have a dark brownish black trim on them.
I removed the chassis and other hardware from the cabinet, and then began to strip
it. As always, I used Parks Refinisher and 000 steel wool to remove the old finish.
Because the finish was so far gone, it did not take much effort. The stripped
cabinet is shown on the right.
Once the radio was stripped, I sanded and grain filled the case. Most of the
scratches came out, although one is still slightly visible. I also fixed two
veneer chips on the front panel, using a similar grained piece of walnut
inserted into the chip and sanded flush. When I first got the radio, I thought
that the original trim might have been black, having lightened over 60 years
to the dark brown I saw when I purchased it. After seaching the Internet,
however, it became clear that the trim was always a nice dark shade of brown.

|
|
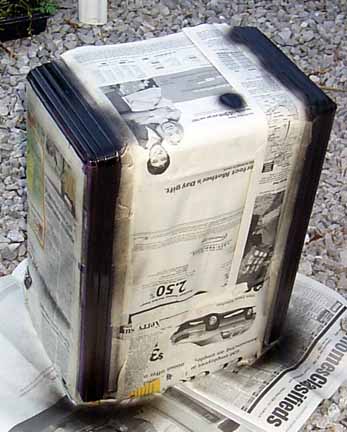
Painting Trim
|
The picture to the left shows the trim being painted. I use a dark brown
paint called Rustoleum Camouflage Brown. It is really more like a flat dark brown
lacquer, as it dries to the touch almost instantly. It is quite easy to work
with, but it is best to tape off the areas to be sprayed as shown in the picture.
Once the trim was painted, the tape and paper were removed, and any overspray
was removed. The radio was then stained, using a walnut colored oil stain.
Usually, as soon as the radio has been stained, I shoot a light coat of clear
lacquer on the radio to get a better idea of just what it will look like done.
Because some of the panels of this radio were cheaper, lightly colored wood,
I knew some toning would be needed to match the front panel.
|
|
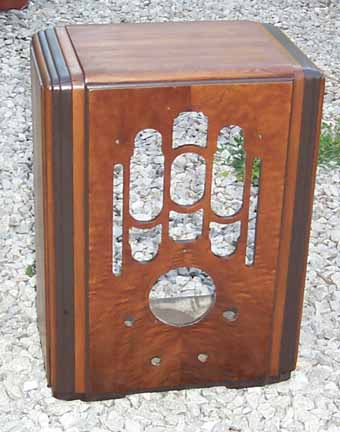
Before Toning Lacquer
|
The photo on the right shows the case after the trim is painted, case is stained,
and with a light coat of clear laquer. The top and sides will still need to
be toned to match the front (it isn't as obvious from this head on shot as it
is with a side angle view). I use Behlen toner products, either Master Toner
or Jet Spray, depending on what I'm trying to do. In this case, I used a brown
toner on the top, sides, and then lightly dusted the front to give the entire
radio the same overall look.

|
|
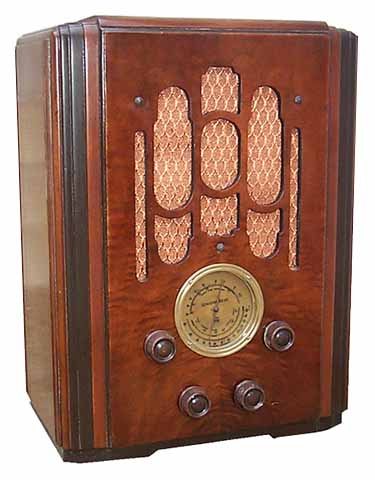
Done!
|
The photo to the left shows the completed radio with new grille cloth, polished
brass dial, etc (click on it for a larger picture). The radio was carefully rubbed out and polished with
furniture wax. I'd say it turned out pretty well. It certainly looks a lot
better than the $30 basket case I came home with!